Setting up a Kubernetes Cluster on a Windows laptop using Hyper-V
For a developer, Minikube is a very good tool to run Kubernetes locally. But having access to an actual Kubernetes Cluster is always fun. This is an account of how I setup a Single Master Kubernetes Cluster on my Windows laptop using VMs running on Hyper-V.
To setup the cluster we are going to use a tool called kubeadm. It simplyfies the setup and all you have to do is call kubeadm init to create a cluster. This is similar to the docker swarm init command which does the heavy lifting of setting up the actual cluster. But to get to kubeadm init, we first need to have a cluster of VMs that can talk to one another.
1. Create the Hyper-V Switch
You need a Hyper-V Virtual Switch which has access to the internet. The easiest way to achieve this is by creating a Switch which uses an External network.
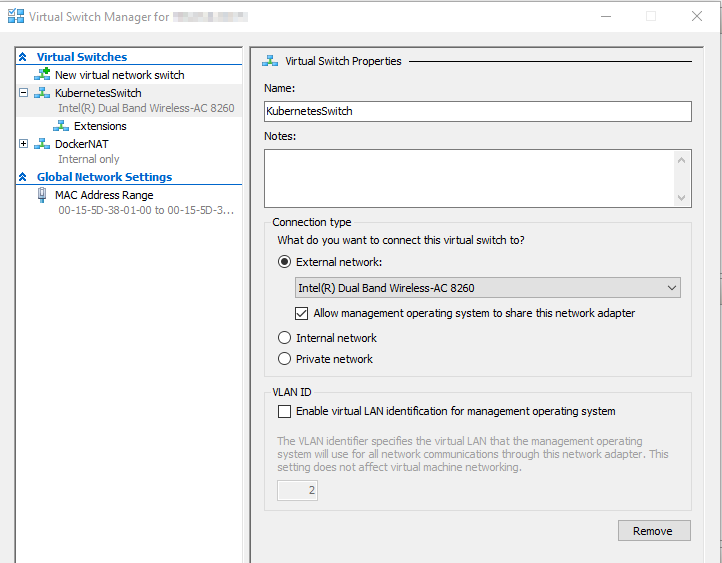
Ensure you check the option Allow management operating system to share this network adapter, if you have just one internet connection and don’t want the host OS to loose internet connection.
You can choose your WiFi network card, as most modern WiFi cards can handle the traffic of a three VM dev Kubernetes Cluster.
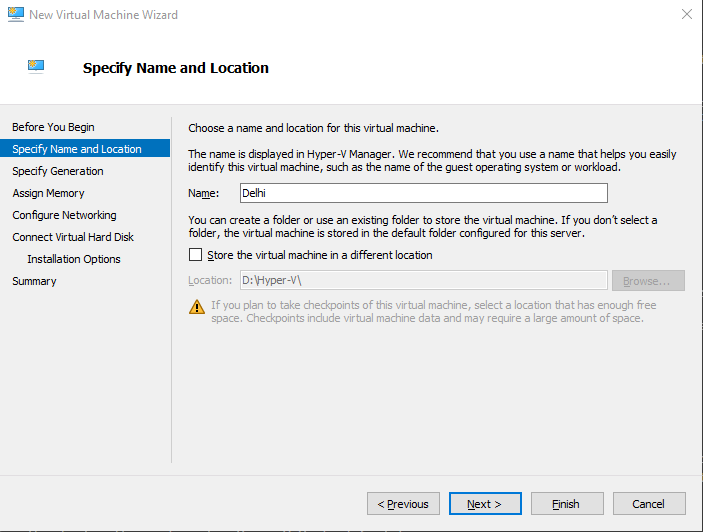
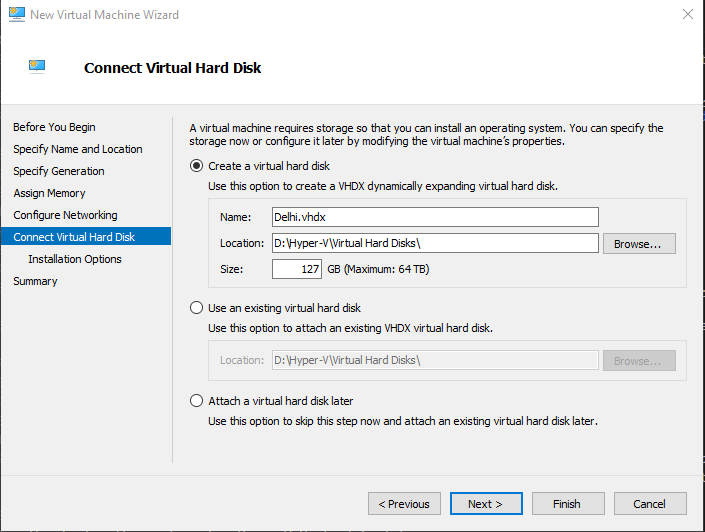
2. Create the Hyper-V VMs
You will need three VMs (one master and two minions). Each VM needs a minimum of 2 CPU cores and 2GB RAM for each node. Anything less and the user experience is not very good.
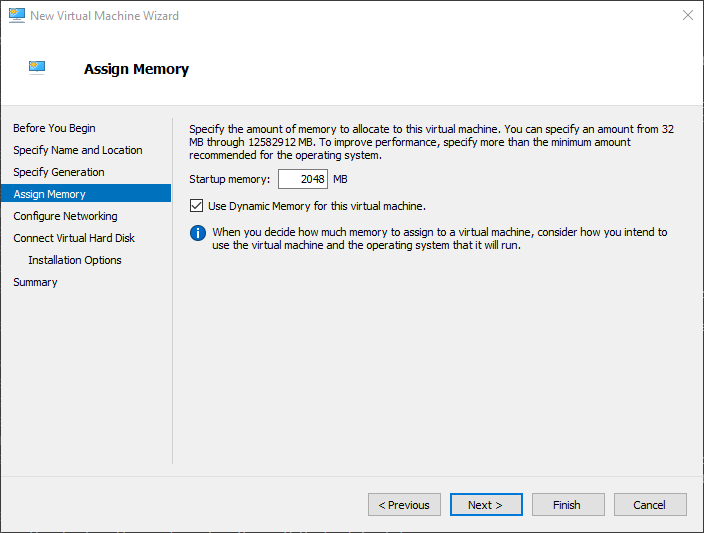
Before you start the VM go to the Settings of the VM and increase the Virtual Processors count to 2.
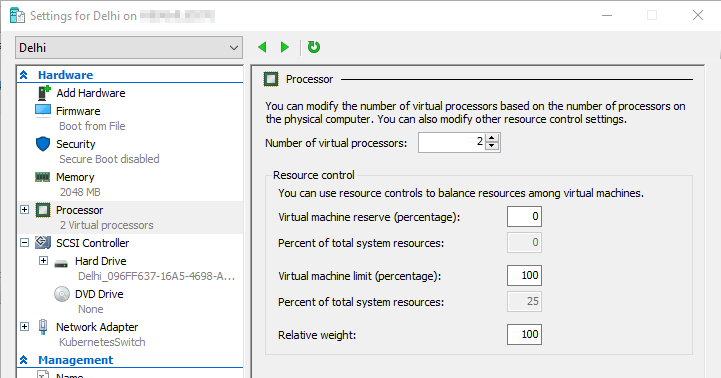
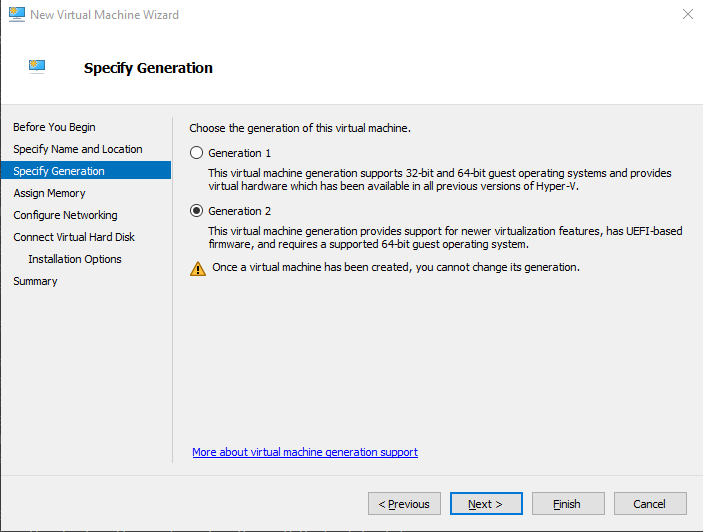
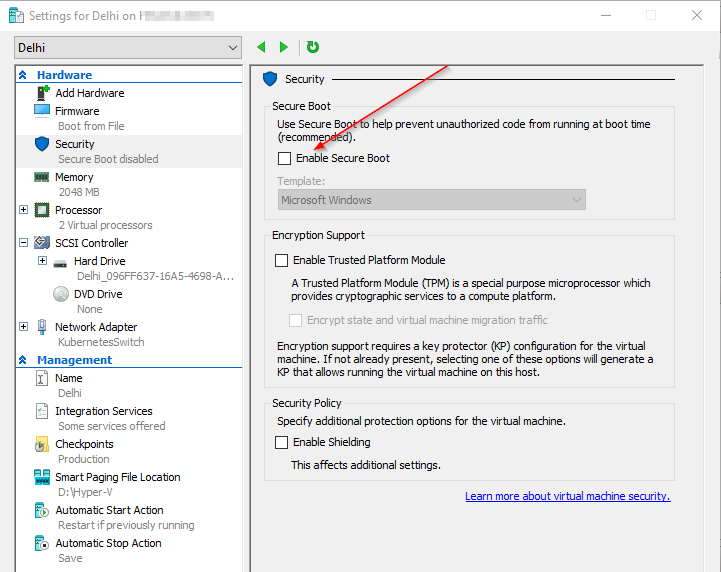
Also for Generation 2 VMs you have to disable Secure Boot by unchecking the Enable Secure Boot setting, other wise when you try to boot from the Ubuntu DVD, you will get an error The image's hash and certificate are not allowed (DB).
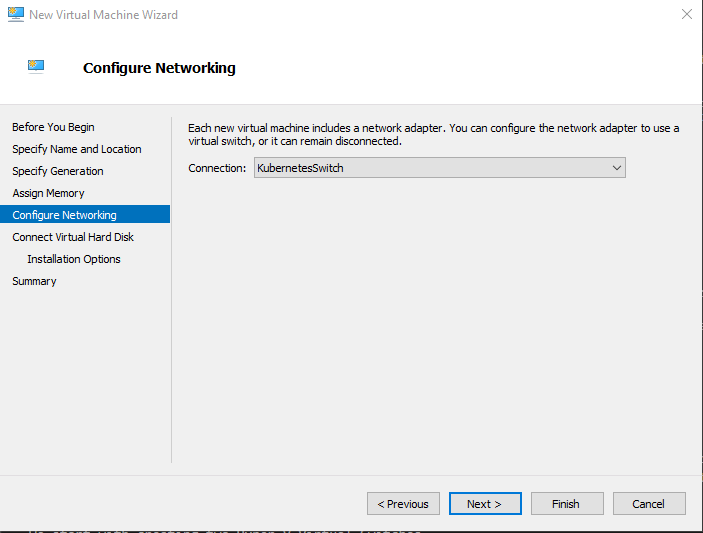
3. Networking the VMs
Our Kubernetes switch is based on an external network so these VMs will show up on the network that the network adapter is attached to. My WiFi adapter is connected to my home network. Which means my home router will be assigning DHCP IP addresses to these VMs.
A Kubernetes cluster depends on the IP addresses of the VMs for communication, so the VMs need to be assigned static IP addresses. We can do this by reserving DHCP addresses on the router.
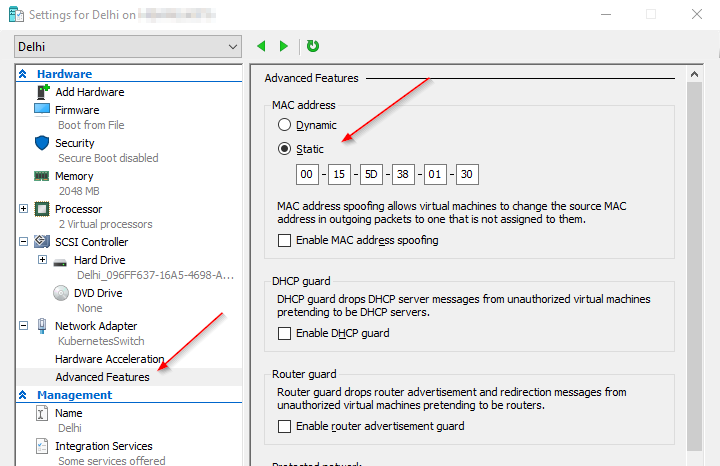
Hyper-V by default uses Dynamic MAC addresses for the VMs. We need to turn this feature off by going to the settings of the VM and assigning a static MAC address.
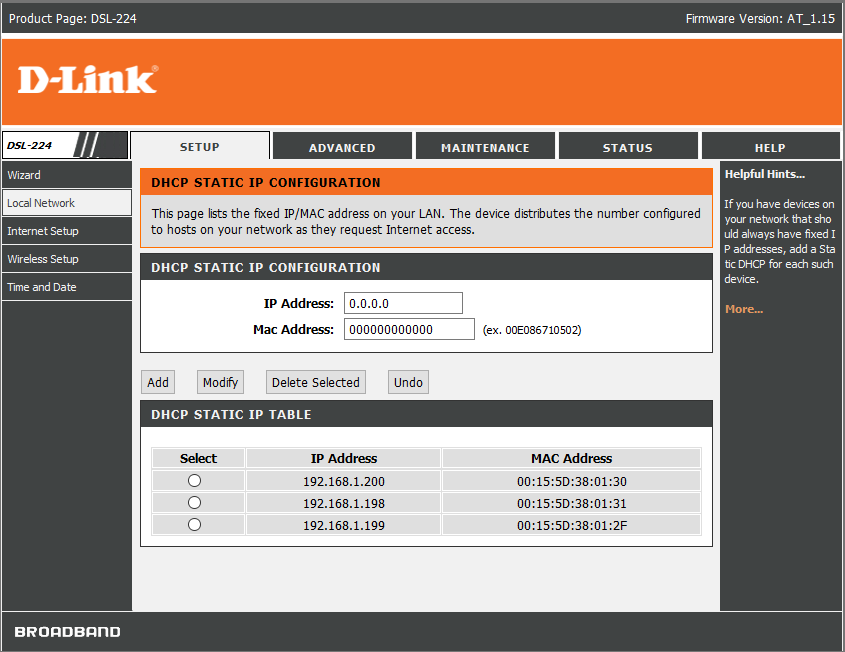
Most routers come with an option to reserve IP addresses based on MAC addresses of the network adapter. You can add the MAC addresses you assigned to your VMs and reserve IP addresses for them.
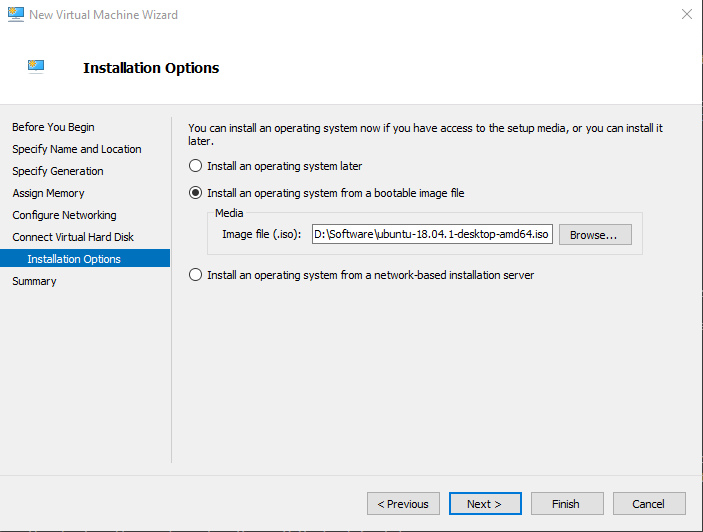
4. Software on the Hyper-V VMs
I chose Ubuntu Bionic OS as the base OS but you are free to choose any of the supported OSes.
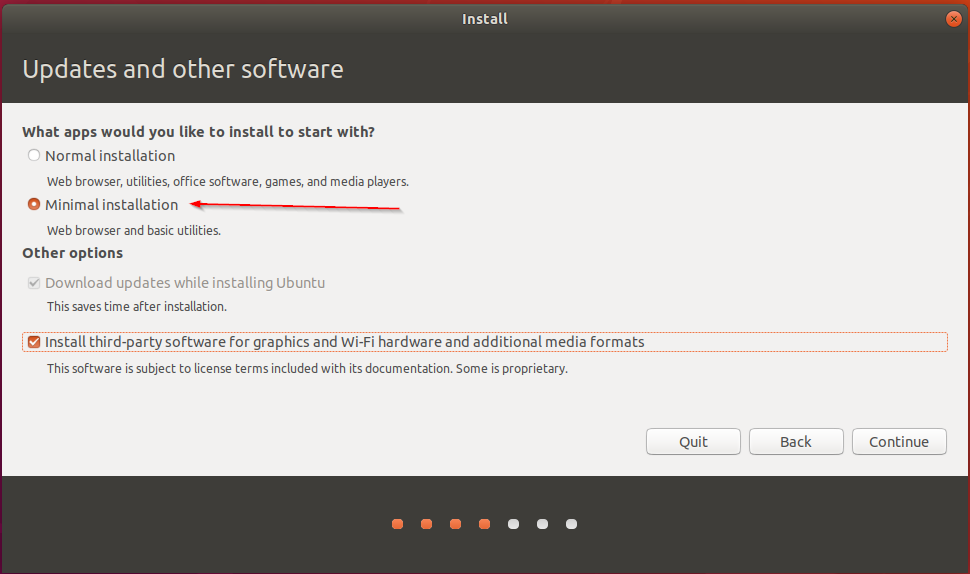
While installing Ubuntu choose the Minimal installation option, as you won’t be using the additional software like media players and word processors.
For a more professional setup you can also choose to install the Ubuntu Server edition.
At this point you should have 3 VMs with static IP addresses. Here is my list
| Machine Name | IP Address | Role |
|---|---|---|
| Delhi | 192.168.1.200 | master |
| Mumbai | 192.168.1.199 | minion 1 |
| Chennai | 192.168.1.198 | minion 2 |
Ensure your VMs pick up the right IP addresses by running
sudo ip addr
5. Install docker, kubeadm, kubelet and kubectl
Installing docker on Ubuntu is pretty straight forward. You can avoid typing the recurring sudo by switching to root user using sudo -i before running these commands.
apt-get update
apt-get install -y docker.io
For installing Kubernetes related software you will have to add the corresponding repository first and then run the install commands. At the time of writing this post only the Xenial builds were available.
apt-get update && apt-get install -y apt-transport-https curl
curl -s https://packages.cloud.google.com/apt/doc/apt-key.gpg | apt-key add -
cat <<EOF >/etc/apt/sources.list.d/kubernetes.list
deb http://apt.kubernetes.io/ kubernetes-xenial main
EOF
apt-get update
apt-get install -y kubelet kubeadm kubectl
You need to install these on all the VMs.
6. Tweak Ubuntu Settings
For Kubernetes to run, you need to turn off the swap file feature. You do this by running the following command
sudo swapoff -a
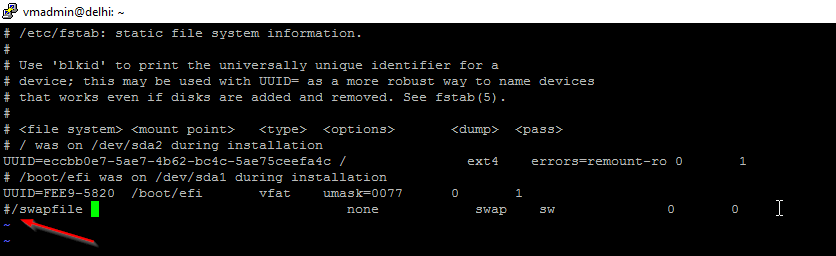
To permanently turn off the swap file usage, edit the file /etc/fstab and comment the line that has /swapfile
Remove the existing swap file by running
sudo rm -f /swapfile
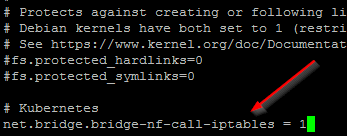
Next you need to edit /etc/sysctl.conf and add net.bridge.bridge-nf-call-iptables = 1 to it. This allows the network traffic on bridge networks to be passed to iptables
Finally you need to enable the docker service by running
sudo systemctl enable docker.service
You need to make these changes on all three VMs and do not forget to restart your VMs after these changes. This is also a good time to Checkpoint your Hyper-V VMs, incase you need to revert back any changes.
7. Kubernetes Master
You create your Kubernetes Cluster by running the following command on the Master node.
sudo kubeadm init
If the command completes successfully, after a few minutes you will get an output similar to
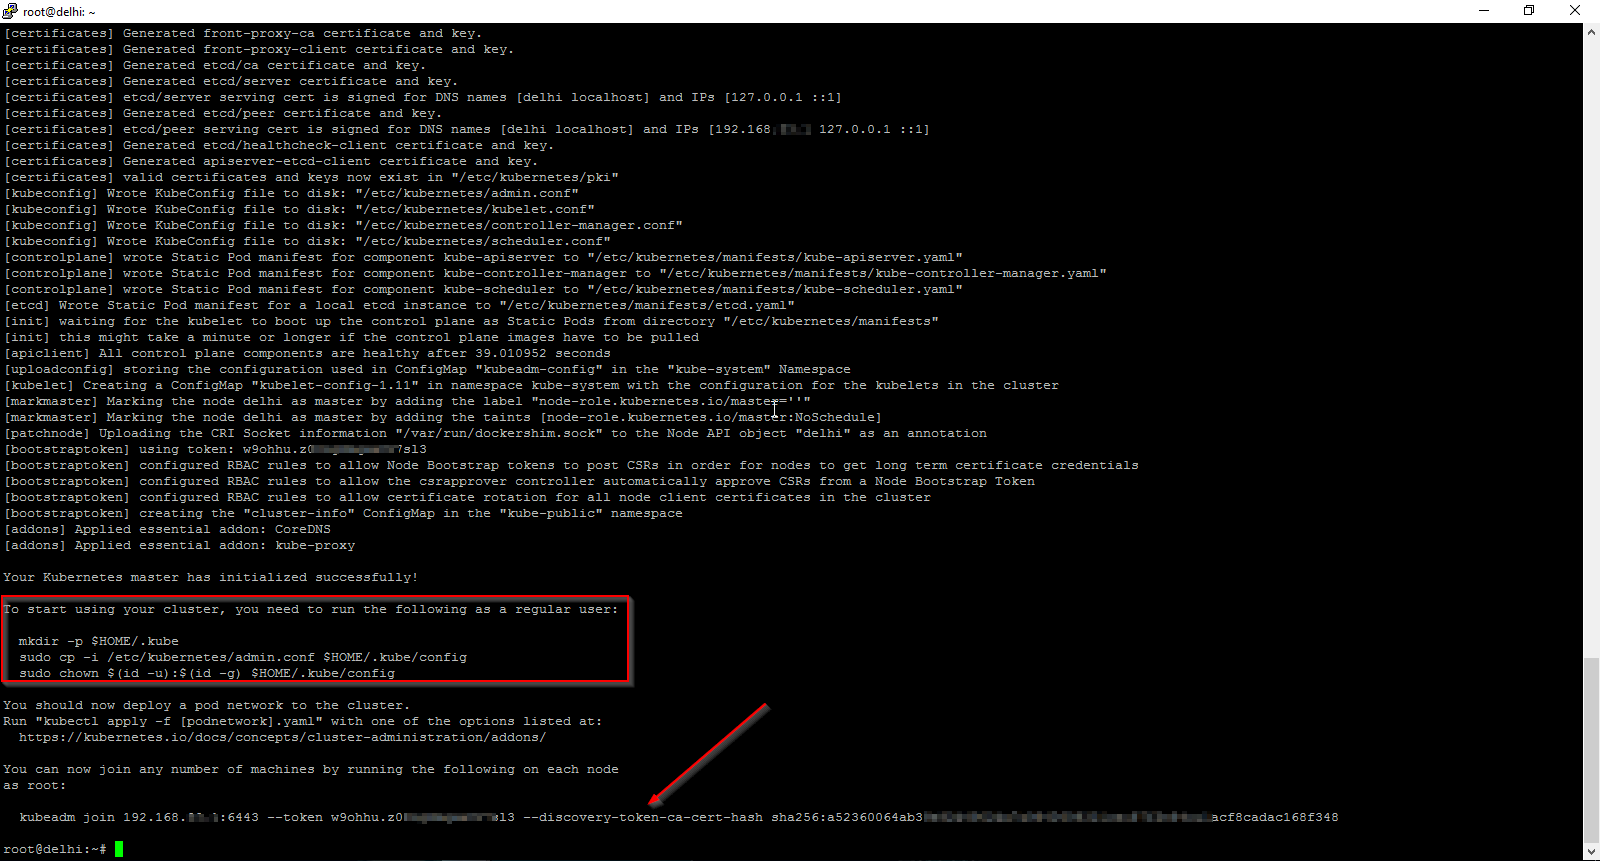
There are two important pieces of information in the output of this command. First you need to run the commands which are highlighted on the master node
mkdir -p $HOME/.kube
sudo cp -i /etc/kubernetes/admin.conf $HOME/.kube/config
sudo chown $(id -u):$(id -g) $HOME/.kube/config
Second you need to copy the kubeadm join command, so that you can run that on the remanining VMs to add them to this cluster.
kubeadm does a lot of the heavy lifting required to setup a Kubernetes Cluster like installing a CA, generating certificates, installing and configuring etcd, getting addons like CoreDNS, kube-proxy. But one thing that is does not do is install a networking addon. For Kubernetes to work you need to have a pod network add-on. There are a lot of CNI providers and you can choose any of them. I chose Weave Net as it does not require any additional configuration. You install it on the Master node by running
kubectl apply -f "https://cloud.weave.works/k8s/net?k8s-version=$(kubectl version | base64 | tr -d '\n')"
8. Kubernetes Nodes
You can add the remaining two VMs as worker nodes to the cluster by running the kubeadm join command that you copied earlier from the Master node.
kubeadm join 192.168.1.200:6443 --token 5auxv4.26************90 --discovery-token-ca-cert-hash sha256:01e5ef2c************************************************6a4ff89564
At this point your Kubernetes Cluster is up and running. You can use the kubectl command from the Master node to query the cluster information.
kubectl cluster-info
kubectl get nodes

If you do not see the STATUS as Ready (give it a few minutes when you add a new node), you can troubleshoot by running
kubectl describe nodes
The describe nodes command gives you a detailed output of the node and will usually be sufficient to figure out issues.